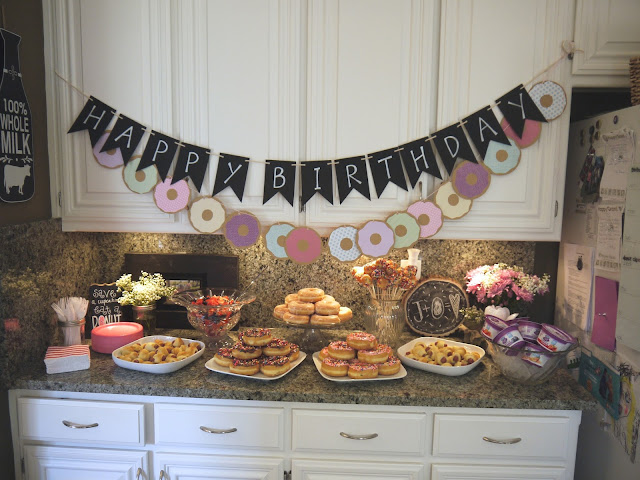
As I do with all of the girls' birthdays, I looked on Pinterest for inspiration for her upcoming party and found a lot of cute ideas, including making your own donut garlands using paper, stencils & puffy paint and one with paper plates and tissue paper. I even borrowed a donut garland that was a friend of a friend's and looked as if it was made by some type of scrapbooking machine, because it had "bites" taken out of it and layering happening.
Source: Beau-Coup Blog {link here}
Source: Kidspot.com {link here}
Supplies needed:
Variety of paper
Scissors
A circular object of just the right size
Exacto knife or box cutter, ideally
Glue stick
Some sort of string or yarn
Single hole punch
First, I gathered up some paper that would work for my donuts. I had some brown craft paper card stock and a whole slew of random papers both in solids and prints that were in colors that would work for me. I was looking for pastels, but any color or pattern will work! I opted to make 16 donuts total and found 8 different papers that I could make 2 donuts each with. You can see I found some patterns, some solids, and even a glitter pink! I thought the polka dot was cute and looked kind of like sprinkles.
I used a bowl to trace circles on both the craft brown and my patterned colored paper. I was using scraps of the colored paper, so some of the edges didn't quite fit, which is okay because you'll end up cutting inside the circles on the colored paper.
I cut out each of the brown circles on the lines, but the colored ones will make the "icing" so you'll want to cut along the inside of the line in a wavy line, all the way around. I cut about 1/4-1/2" inside. It depends on how much of the donut you want to see around the outside. Oh, and didn't even draw it, just started cutting but if you're not visual, I would suggest drawing it first. You'll get little pieces like this...
Next, you'll glue the icing pieces down to the brown donut pieces to finish your donuts. It's even better if you have a helper! You can see here on the back how I didn't even carefully cut on my circle. Also, I was able to cut multiple donuts at a time - depends on your blade.
Cute little donuts!
I don't think they need anything else. I love the simplicity of them and the patterned paper did enough for me. But, since you have that hole punch out you could always punch out some little colored paper circles, empty the punch-catcher, and utilize those tiny little pieces of paper by gluing them down as sprinkles. This might prove especially helpful if you have only plain colored paper on hand.
At some point, you will have to decide the order of your donuts on the garland. Try to space out the similar colors & patterns. I also chose to eliminate the orange because it didn't seem to jive with the other colors. Make it work for you!
Finally, punch a hole or two {I did one & wished I'd done two} in the top of your donut & string them one at a time on the yarn or string you've selected! I used some pink and white baker's twine that I had on hand. Something thicker may keep the donuts in place better. With one hole and on thin string, they did slide around a bit. I solved this problem by essentially tying each one to the string, but I think with either two holes or with thicker string, or both, you'd get better results.
That's it! Hang it up anywhere and everywhere. This was one of the few things that I made for Janie's donut shoppe party and I was super pleased with how easy it was yet how much cuteness it still added.
Easier-than-easy! Happy crafting.


No comments:
Post a Comment